Installation Guide
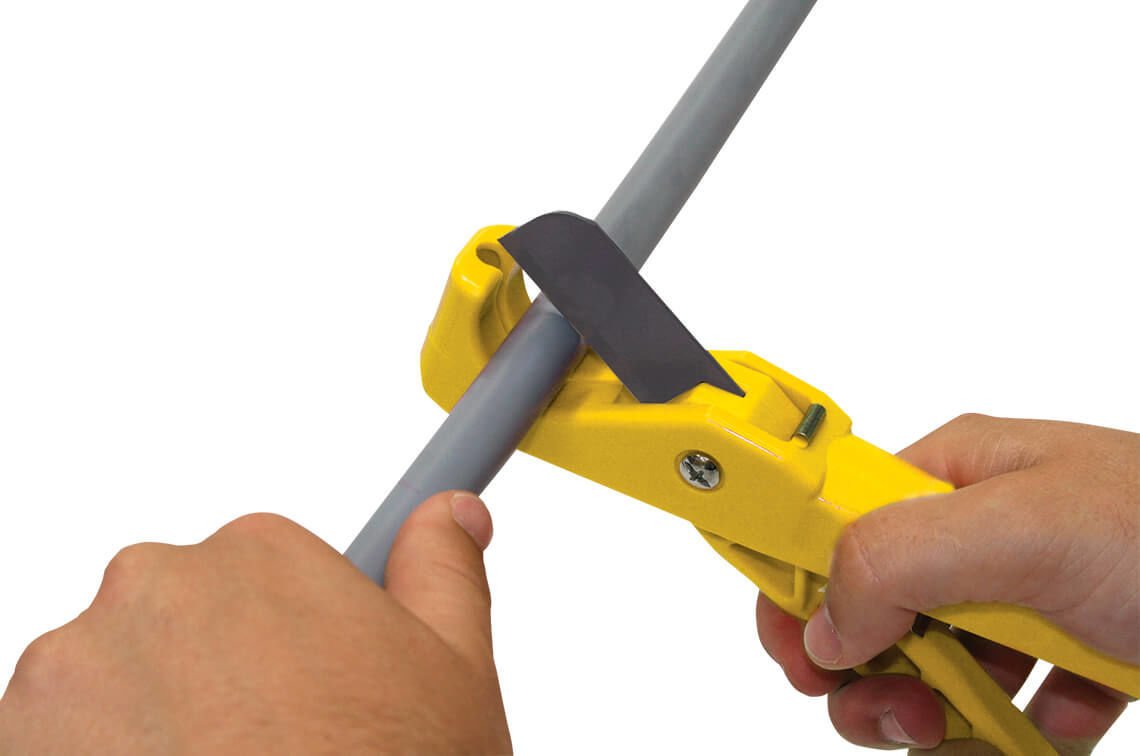
Step 1. Cut Buteline Pipe
Always use a Buteline pipe cutter to ensure a square, clean, burr-free cut. Cut the pipe on an indicator line.
To assist the pipe cutting process slightly twist the cutter as you begin to cut.
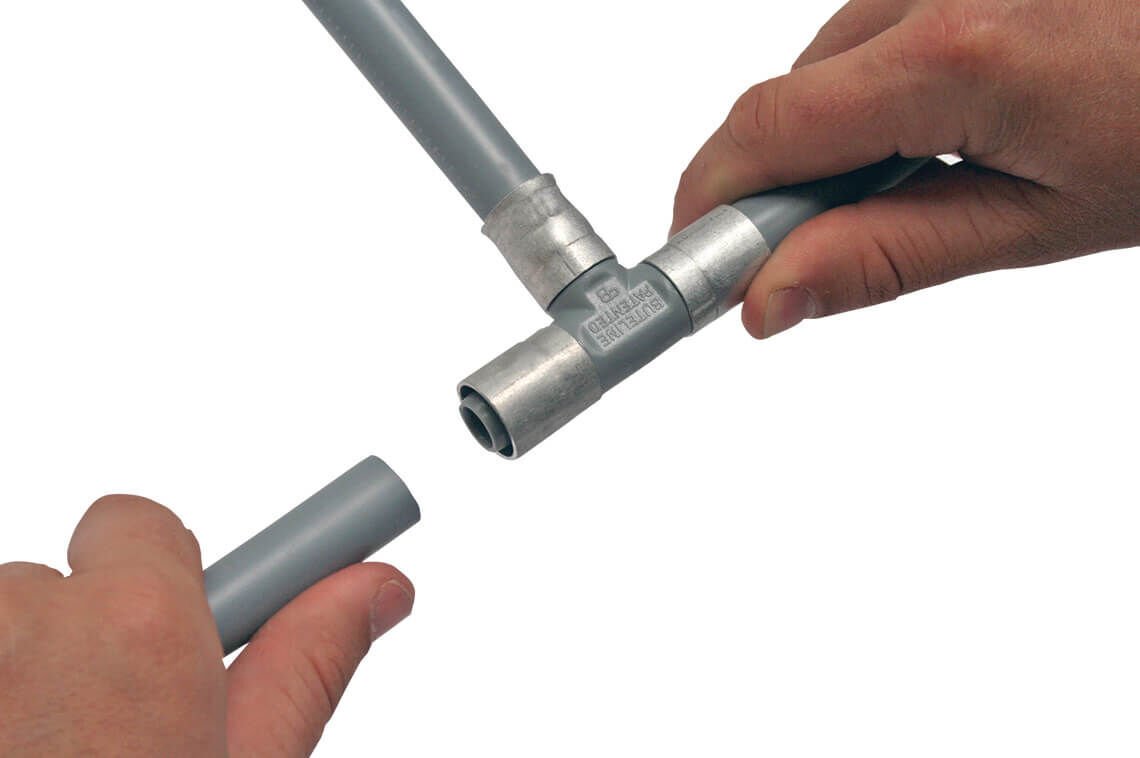
Step 2. Insert Pipe into Buteline Fitting
Once you have cut the pipe, simply insert the pipe into the Buteline fitting and push fully home to the shoulder of the fitting (up to the next indicator line of the same size).
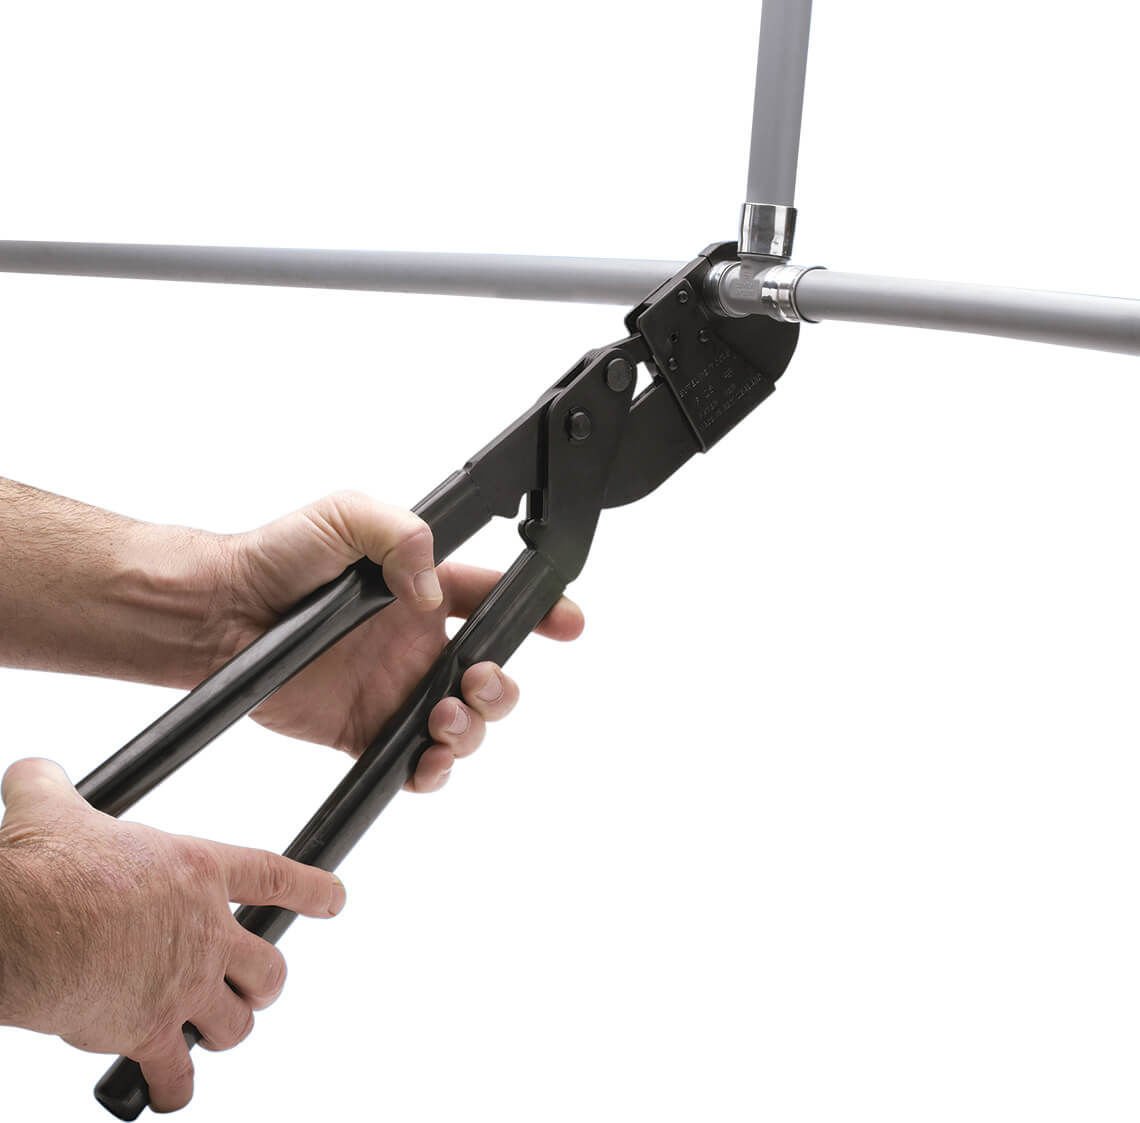
Step 3. Clamp Fitting
Clamp the Buteline fitting, using ONLY the Buteline clamp tool.
Position the Buteline clamp tool squarely, approximately 2mm in from the end of the clamp ring.
Close handles to stops, hold in the tightly closed position for a moment to ensure that the flow of material is performed. Open and remove the tool.
* When burying Buteline fittings underground or when in contact with concrete (or when using for marine purposes), wrap the aluminium rings directly with PVC insulation tape or similar to prevent corrosion.
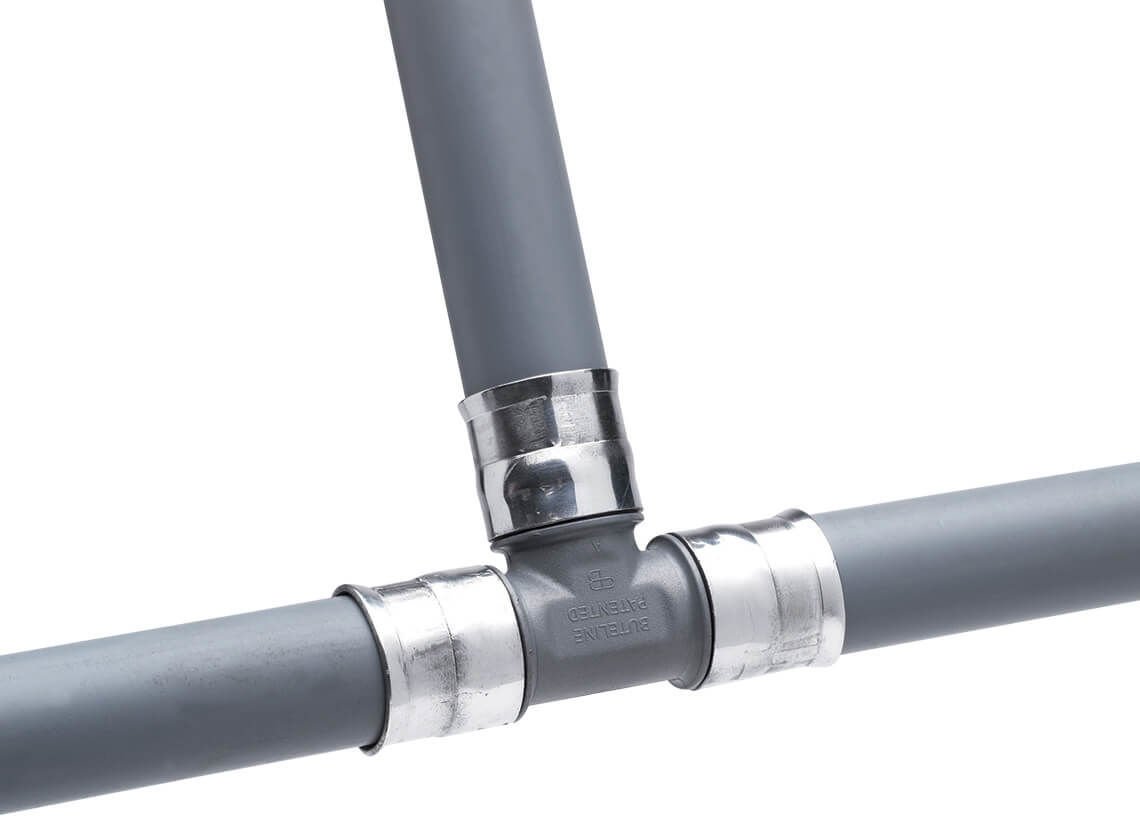
Step 4. All Complete
Installing the Buteline Plumbing System is quick and sure and always provides a visual indicator of joint completion.
As you can see, the process of using the Buteline system is quick, simple and highly efficient.